First programs in wxWidgets
last modified October 18, 2023
In this chapter, we cover the basics needed to create wxWidgets applications. We create our first simple example, show how to display an icon. Next we create a simple example demonstrating usage of an event. Finally, we see how widgets communicate in wxWidgets applications.
A simple application
First we create the very basic wxWidgets program.
#include <wx/wx.h>

class Simple : public wxFrame
{
public:
    Simple(const wxString& title);

};
#include "simple.h"

Simple::Simple(const wxString& title)
       : wxFrame(NULL, wxID_ANY, title, wxDefaultPosition, wxSize(250, 150))
{
  Centre();
}
#include <wx/wx.h>

class MyApp : public wxApp
{
  public:
    virtual bool OnInit();
};
#include "main.h"
#include "simple.h"

IMPLEMENT_APP(MyApp)

bool MyApp::OnInit()
{
    Simple *simple = new Simple(wxT("Simple"));
    simple->Show(true);

    return true;
}
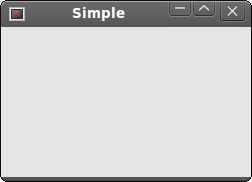
This very basic example shows a small window on the screen. The window is centered.
Centre();
This method centers the window on the screen, both horizontally and vertically.
IMPLEMENT_APP(MyApp)
The code that implements the application is hidden behind this macro. This is copy and paste code, we usually do not have to care about.
g++ main.cpp main.h simple.cpp simple.h `wx-config --cxxflags --libs` -o simple
To compile the example on Unix, run the above command.
Application icon
In this example, we provide an icon for our application. It became a standard to display a small icon in the upper left corner of the window. The icon is a graphical identity of the program.
#include <wx/wx.h>

class Icon : public wxFrame
{
public:
    Icon(const wxString& title);

};
#include "icon.h"

Icon::Icon(const wxString& title)
       : wxFrame(NULL, wxID_ANY, title, wxDefaultPosition, wxSize(250, 150))
{
  SetIcon(wxIcon(wxT("web.xpm")));
  Centre();
}
#include <wx/wx.h>

class MyApp : public wxApp
{
  public:
    virtual bool OnInit();
};
#include "main.h"
#include "icon.h"

IMPLEMENT_APP(MyApp)

bool MyApp::OnInit()
{
    Icon *icon = new Icon(wxT("Icon"));
    icon->Show(true);

    return true;
}
In our example we show a small web icon.
SetIcon(wxIcon(wxT("web.xpm")));
To display an application icon is a matter of one code line. XPM (X PixMap) is an ASCII image format.
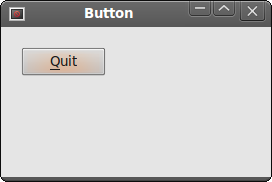
A simple button
In the following example, we create a button on the frame widget. We show, how to create a simple event handler.
#include <wx/wx.h>

class Button : public wxFrame
{
public:
    Button(const wxString& title);

    void OnQuit(wxCommandEvent & event);
};
#include "button.h"

Button::Button(const wxString& title)
       : wxFrame(NULL, wxID_ANY, title, wxDefaultPosition, wxSize(270, 150))
{
  wxPanel *panel = new wxPanel(this, wxID_ANY);

  wxButton *button = new wxButton(panel, wxID_EXIT, wxT("Quit"),
      wxPoint(20, 20));
  Connect(wxID_EXIT, wxEVT_COMMAND_BUTTON_CLICKED,
      wxCommandEventHandler(Button::OnQuit));
  button->SetFocus();
  Centre();
}

void Button::OnQuit(wxCommandEvent & WXUNUSED(event))
{
    Close(true);
}
#include <wx/wx.h>

class MyApp : public wxApp
{
  public:
    virtual bool OnInit();
};
#include "main.h"
#include "button.h"

IMPLEMENT_APP(MyApp)

bool MyApp::OnInit()
{

    Button *btnapp = new Button(wxT("Button"));
    btnapp->Show(true);

    return true;
}
wxPanel *panel = new wxPanel(this, wxID_ANY);
First we create a wxPanel widget. It will be placed inside
a wxFrame widget.
wxButton *button = new wxButton(panel, wxID_EXIT, wxT("Quit"), wxPoint(20, 20));
We create a wxButton widget. It is placed on the panel. We use
the predefined wxID_EXIT id for the button.
It will cause to display a small exit icon on the button. The label of
the button is "Quit". The button is positioned manually at x=20, y=20 coordinates.
The beginning of the coordinate system is at the upper left hand corner.
Connect(wxID_EXIT, wxEVT_COMMAND_BUTTON_CLICKED,
    wxCommandEventHandler(Button::OnQuit));
If we click on the button, a wxEVT_COMMAND_BUTTON_CLICKED event is
generated. We connect the event to the OnQuit method of the
Button class. So when we click on the button, the OnQuit
method is called.
button->SetFocus();
We set the keyboard focus to the button. So if we press the Enter key, the button is being clicked.
Close(true);
Inside the OnQuit method, we call the Close
method. This will terminate our application.
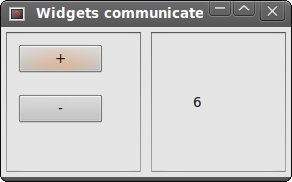
Widgets communicate
It is important to know, how widgets can communicate in application. Follow the next example.
#include <wx/wx.h>
#include <wx/panel.h>

class LeftPanel : public wxPanel
{
public:
    LeftPanel(wxPanel *parent);

    void OnPlus(wxCommandEvent & event);
    void OnMinus(wxCommandEvent & event);

    wxButton *m_plus;
    wxButton *m_minus;
    wxPanel *m_parent;
    int count;

};

class RightPanel : public wxPanel
{
public:
    RightPanel(wxPanel *parent);

    void OnSetText(wxCommandEvent & event);

    wxStaticText *m_text;

};

const int ID_PLUS = 101;
const int ID_MINUS = 102;
#include <wx/stattext.h>
#include "Communicate.h"

LeftPanel::LeftPanel(wxPanel * parent)
       : wxPanel(parent, -1, wxPoint(-1, -1), wxSize(-1, -1), wxBORDER_SUNKEN)
{
  count = 0;
  m_parent = parent;
  m_plus = new wxButton(this, ID_PLUS, wxT("+"),
      wxPoint(10, 10));
  m_minus = new wxButton(this, ID_MINUS, wxT("-"),
      wxPoint(10, 60));
  Connect(ID_PLUS, wxEVT_COMMAND_BUTTON_CLICKED,
      wxCommandEventHandler(LeftPanel::OnPlus));
  Connect(ID_MINUS, wxEVT_COMMAND_BUTTON_CLICKED,
      wxCommandEventHandler(LeftPanel::OnMinus));
}

void LeftPanel::OnPlus(wxCommandEvent & WXUNUSED(event))
{
  count++;

  Communicate *comm = (Communicate *) m_parent->GetParent();
  comm->m_rp->m_text->SetLabel(wxString::Format(wxT("%d"), count));
}

void LeftPanel::OnMinus(wxCommandEvent & WXUNUSED(event))
{
  count--;

  Communicate *comm = (Communicate *) m_parent->GetParent();
  comm->m_rp->m_text->SetLabel(wxString::Format(wxT("%d"), count));
}


RightPanel::RightPanel(wxPanel * parent)
       : wxPanel(parent, wxID_ANY, wxDefaultPosition,
         wxSize(270, 150), wxBORDER_SUNKEN)
{
    m_text = new wxStaticText(this, -1, wxT("0"), wxPoint(40, 60));
}
#include "Panels.h"
#include <wx/wxprec.h>


class Communicate : public wxFrame
{
public:
    Communicate(const wxString& title);


    LeftPanel *m_lp;
    RightPanel *m_rp;
    wxPanel *m_parent;

};
#include "Communicate.h"

Communicate::Communicate(const wxString& title)
       : wxFrame(NULL, wxID_ANY, title, wxDefaultPosition, wxSize(290, 150))
{
  m_parent = new wxPanel(this, wxID_ANY);

  wxBoxSizer *hbox = new wxBoxSizer(wxHORIZONTAL);

  m_lp = new LeftPanel(m_parent);
  m_rp = new RightPanel(m_parent);

  hbox->Add(m_lp, 1, wxEXPAND | wxALL, 5);
  hbox->Add(m_rp, 1, wxEXPAND | wxALL, 5);

  m_parent->SetSizer(hbox);

  this->Centre();
}
#include <wx/wx.h>

class MyApp : public wxApp
{
  public:
    virtual bool OnInit();
};
#include "main.h"
#include "Communicate.h"

IMPLEMENT_APP(MyApp)

bool MyApp::OnInit()
{

    Communicate *communicate = new Communicate(wxT("Widgets communicate"));
    communicate->Show(true);

    return true;
}
In our example we have two panels. A left and right panel. The left panel has two buttons. The right panel has one static text. The buttons change the number displayed in the static text. The question is, how do we grab the pointer to the static text?
m_parent = parent;
Here we save the pointer to the parent widget of the LeftPanel.
It is a wxPanel widget.
Communicate *comm = (Communicate *) m_parent->GetParent();
comm->m_rp->m_text->SetLabel(wxString::Format(wxT("%d"), count));
These two lines are the most important lines of the example. It is shown, how we get access to the static text widget, which is placed on a different panel. First we get the parent of the both left and right panels. This parent widget has a pointer to the right panel. And the right panel has a pointer to the static text.
In this part of the wxWidgets tutorial, we have created some simple programs.