PyQt QPropertyAnimation
last modified August 24, 2023
In this article we show how to create animations in PyQt with
QPropertyAnimation. In the examples we animation size, colour, and
position of objects.
Visit Advanced PyQt5 e-book, read PyQt6 tutorial, or list all PyQt tutorials.
QPropertyAnimation
QPropertyAnimation interpolates over PyQt properties. A class
declaring properties must be a QObject.
QPropertyAnimation methods
The following table shows a few important QPropertyAnimation
methods:
| Name | Description |
|---|---|
| start | starts animation |
| stop | terminates animation |
| setStartValue | sets the starting value of animation |
| setEndValue | sets the ending value of animation |
| setDuration | sets the duration of animation, in ms |
| setKeyValueAt | creates a key frame at the given step with the given value |
| setLoopCount | sets the number of repetitions of the animation |
Animating size with QPropertyAnimation
In the first example we animate the size of a widget.
#!/usr/bin/python

from PyQt6.QtWidgets import QWidget, QApplication, QFrame, QPushButton
from PyQt6.QtCore import QRect, QPropertyAnimation
import sys

class Example(QWidget):

    def __init__(self):
        super().__init__()

        self.initUI()

    def initUI(self):

        self.button = QPushButton("Start", self)
        self.button.clicked.connect(self.doAnim)
        self.button.move(30, 30)

        self.frame = QFrame(self)
        self.frame.setFrameStyle(QFrame.Shape.Panel | QFrame.Shadow.Raised)
        self.frame.setGeometry(150, 30, 100, 100)

        self.setGeometry(300, 300, 380, 300)
        self.setWindowTitle('Animation')
        self.show()

    def doAnim(self):

        self.anim = QPropertyAnimation(self.frame, b"geometry")
        self.anim.setDuration(10000)
        self.anim.setStartValue(QRect(150, 30, 100, 100))
        self.anim.setEndValue(QRect(150, 30, 200, 200))
        self.anim.start()


def main():

    app = QApplication([])
    ex = Example()
    sys.exit(app.exec())


if __name__ == "__main__":
    main()
The example animates the size of a QFrame widget.
self.button = QPushButton("Start", self)
self.button.clicked.connect(self.doAnim)
self.button.move(30, 30)
The animation is started with a QPushButton.
self.anim = QPropertyAnimation(self.frame, b"geometry")
QPropertyAnimation is created. The first parameter is the
target object to be animation; in our case, we animate a QFrame
widget. The second parameter is the property that is going to be changed.
self.anim.setDuration(10000)
The setDuration sets the duration of the animation in milliseconds.
self.anim.setStartValue(QRect(150, 30, 100, 100))
self.anim.setEndValue(QRect(150, 30, 200, 200))
With setStartValue and setEndValue), we define the
starting and ending values of the animation, respectively.
self.anim.start()
Animation begins with the start method.
Animating colour with QPropertyAnimation
The following example animates the colour of a widget. Since there is no colour property, we have to create one.
#!/usr/bin/python


from PyQt6.QtWidgets import (QWidget, QApplication, QPushButton,
                             QLabel, QHBoxLayout, QSizePolicy)
from PyQt6.QtGui import QColor
from PyQt6.QtCore import QPropertyAnimation, pyqtProperty
import sys

class MyLabel(QLabel):

    def __init__(self, text):
        super().__init__(text)

    def _set_color(self, col):

        palette = self.palette()
        palette.setColor(self.foregroundRole(), col)
        self.setPalette(palette)

    color = pyqtProperty(QColor, fset=_set_color)


class Example(QWidget):

    def __init__(self):
        super().__init__()

        self.initUI()

    def initUI(self):

        hbox = QHBoxLayout(self)

        self.button = QPushButton("Start", self)
        self.button.setSizePolicy(QSizePolicy.Policy.Fixed,
                                  QSizePolicy.Policy.Fixed)
        hbox.addWidget(self.button)

        hbox.addSpacing(40)

        self.label = MyLabel("Summer")
        font = self.label.font()
        font.setPointSize(35)
        self.label.setFont(font)
        hbox.addWidget(self.label)

        self.anim = QPropertyAnimation(self.label, b"color")
        self.anim.setDuration(2500)
        self.anim.setLoopCount(2)
        self.anim.setStartValue(QColor(0, 0, 0))
        self.anim.setEndValue(QColor(0, 110, 150))

        self.button.clicked.connect(self.anim.start)

        self.setGeometry(300, 300, 380, 250)
        self.setWindowTitle('Color anim')
        self.show()


def main():

    app = QApplication([])
    ex = Example()
    sys.exit(app.exec())


if __name__ == "__main__":
    main()
The example gradually changes the colour value of a QLabel.
class MyLabel(QLabel):

    def __init__(self, text):
        super().__init__(text)

    def _set_color(self, col):

        palette = self.palette()
        palette.setColor(self.foregroundRole(), col)
        self.setPalette(palette)

    color = pyqtProperty(QColor, fset=_set_color)
QLabel does not have a color property; therefore, we define one
with pyqtProperty. Changing this property updates the colour of the
label.
self.anim = QPropertyAnimation(self.label, b"color")
The QPropertyAnimation changes the color property
of the label widget.
self.anim.setLoopCount(2)
With the setLoopCount method we can change how many times
the animation will run.
self.anim.setStartValue(QColor(0, 0, 0))
self.anim.setEndValue(QColor(0, 110, 150))
We set the starting and ending colour values.
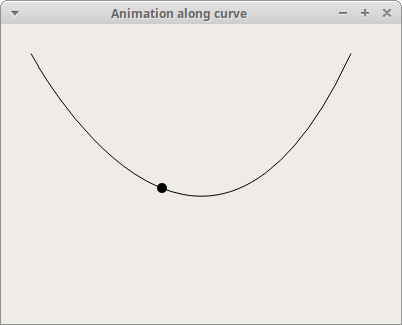
Animation along curve with QPropertyAnimation
The following example animates a ball along a Bézier curve.
#!/usr/bin/python

from PyQt6.QtWidgets import QApplication, QWidget, QLabel
from PyQt6.QtGui import QPainter, QPixmap, QPainterPath
from PyQt6.QtCore import QPoint, QPropertyAnimation, pyqtProperty
import sys


class Ball(QLabel):

    def __init__(self, parent):
        super().__init__(parent)

        pix = QPixmap("ball.png")
        self.h = pix.height()
        self.w = pix.width()

        self.setPixmap(pix)

    def _set_pos(self, pos):

        self.move(pos.x() - self.w//2, pos.y() - self.h//2)

    pos = pyqtProperty(QPoint, fset=_set_pos)


class Example(QWidget):

    def __init__(self):
        super().__init__()

        self.initView()
        self.initAnimation()

    def initView(self):

        self.path = QPainterPath()
        self.path.moveTo(30, 30)
        self.path.cubicTo(30, 30, 200, 350, 350, 30)

        self.ball = Ball(self)

        self.ball.pos = QPoint(30, 30)

        self.setWindowTitle("Animation along curve")
        self.setGeometry(300, 300, 400, 300)
        self.show()

    def paintEvent(self, e):

        qp = QPainter()
        qp.begin(self)
        qp.setRenderHint(QPainter.RenderHint.Antialiasing)
        qp.drawPath(self.path)
        qp.end()

    def initAnimation(self):

        self.anim = QPropertyAnimation(self.ball, b'pos')
        self.anim.setDuration(7000)

        self.anim.setStartValue(QPoint(30, 30))

        vals = [p/100 for p in range(0, 101)]

        for i in vals:
            self.anim.setKeyValueAt(i, self.path.pointAtPercent(i))

        self.anim.setEndValue(QPoint(350, 30))
        self.anim.start()


def main():

    app = QApplication(sys.argv)
    ex = Example()
    sys.exit(app.exec())


if __name__ == '__main__':
    main()
The example draws a curve on the window. It animates a ball object along the painted curve.
class Ball(QLabel):

    def __init__(self, parent):
        super().__init__(parent)

        pix = QPixmap("ball.png")
        self.h = pix.height()
        self.w = pix.width()

        self.setPixmap(pix)
The ball is displayed in a QLabel widget.
def _set_pos(self, pos):

    self.move(pos.x() - self.w//2, pos.y() - self.h//2)

pos = pyqtProperty(QPoint, fset=_set_pos)
We adjust the position of the ball; we want the middle of the label to be placed on the curve.
self.path = QPainterPath()
self.path.moveTo(30, 30)
self.path.cubicTo(30, 30, 200, 350, 350, 30)
The Bézier curve is created with QPainterPath. Its
cubicTo method takes starting point, control point, and ending
point as parameters.
def paintEvent(self, e):

    qp = QPainter()
    qp.begin(self)
    qp.setRenderHint(QPainter.RenderHint.Antialiasing)
    qp.drawPath(self.path)
    qp.end()
The curve is painted with the drawPath method in the
paintEvent method.
self.anim = QPropertyAnimation(self.ball, b'pos')
We animate the ball's pos property with QPropertyAnimation.
vals = [p/100 for p in range(0, 101)]
With the Python list comprehension, we create a list of animation steps. The steps are values between 0 and 1.
for i in vals:
    self.anim.setKeyValueAt(i, self.path.pointAtPercent(i))
With setKeyValueAt, we define the position of the ball at the given
step. With pointAtPercent, we get the QPoint at the
given percentage of the path.
QPropertyAnimation in Graphics View Framework
QPropertyAnimation can animate graphics items in the Graphics View
Framework. The animated object must inherit from QObject
and QGraphicsItem.
#!/usr/bin/python

from PyQt6.QtWidgets import (QApplication, QGraphicsView,
                             QGraphicsPixmapItem, QGraphicsScene)
from PyQt6.QtGui import QPainter, QPixmap
from PyQt6.QtCore import (QObject, QPointF, QPropertyAnimation, pyqtProperty)
import sys


class Ball(QObject):

    def __init__(self):
        super().__init__()

        self.pixmap_item = QGraphicsPixmapItem(QPixmap('ball.png'))

    def _set_pos(self, pos):
        self.pixmap_item.setPos(pos)

    pos = pyqtProperty(QPointF, fset=_set_pos)


class Example(QGraphicsView):

    def __init__(self):
        super().__init__()

        self.initView()

    def initView(self):

        self.ball = Ball()

        self.anim = QPropertyAnimation(self.ball, b'pos')
        self.anim.setDuration(8000)
        self.anim.setStartValue(QPointF(5, 30))

        self.anim.setKeyValueAt(0.3, QPointF(80, 30))
        self.anim.setKeyValueAt(0.5, QPointF(200, 30))
        self.anim.setKeyValueAt(0.8, QPointF(250, 250))

        self.anim.setEndValue(QPointF(290, 30))

        self.scene = QGraphicsScene(self)
        self.scene.setSceneRect(0, 0, 300, 300)
        self.scene.addItem(self.ball.pixmap_item)
        self.setScene(self.scene)

        self.setWindowTitle('Ball animation')
        self.setRenderHint(QPainter.RenderHint.Antialiasing)
        self.setGeometry(400, 300, 500, 350)

        self.anim.start()

        self.show()


def main():

    app = QApplication(sys.argv)
    ex = Example()
    sys.exit(app.exec())


if __name__ == '__main__':
    main()
The example animates a ball object with QPropertyAnimation
in a Graphics View Framework.
class Ball(QObject):

    def __init__(self):
        super().__init__()

        self.pixmap_item = QGraphicsPixmapItem(QPixmap('ball.png'))

    def _set_pos(self, pos):
        self.pixmap_item.setPos(pos)

    pos = pyqtProperty(QPointF, fset=_set_pos)
Sice PyQt does not support multiple inheritance, we use composition technique to fullfill the previously mentioned condition.
class Example(QGraphicsView):

    def __init__(self):
        super().__init__()

        self.initView()
QGraphicsView visualizes the contents of a
QGraphicsScene in a scrollable viewport.
self.anim = QPropertyAnimation(self.ball, b'pos')
We are going to animate the position property of the ball object with
QPropertyAnimation.
self.anim.setDuration(8000)
The animation lasts eight seconds.
self.anim.setKeyValueAt(0.3, QPointF(80, 30))
self.anim.setKeyValueAt(0.5, QPointF(200, 30))
self.anim.setKeyValueAt(0.8, QPointF(250, 250))
With the setKeyValueAt method we create a key frame at the given
step with the given value. In other words, we define where the ball is located
at the given step of the animation.
self.scene = QGraphicsScene(self)
self.scene.setSceneRect(0, 0, 300, 300)
self.scene.addItem(self.ball.pixmap_item)
QGraphicsScene is created and the ball is added to the scene.
It provides a surface for managing a large number of 2D graphical items.
Notice that we add the ball property to the scene, not the ball object.
In this article we have created animation with QPropertyAnimation.
Author
List all PyQt tutorials.