Widgets
last modified January 10, 2023
In this section, we will introduce basic widgets in wxPython. Each widget will have a small code example. Widgets are basic building blocks of an application. wxPython has a wide range of various widgets, including buttons, check boxes, sliders, and list boxes.
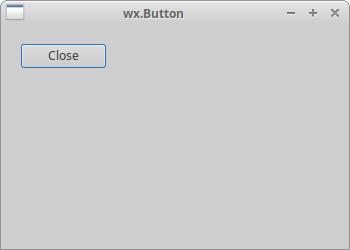
wx.Button
wx.Button is a simple widget. It contains a text string.
It is used to trigger an action.
#!/usr/bin/env python

"""
ZetCode wxPython tutorial

In this code example, we create a
button widget.

author: Jan Bodnar
website: www.zetcode.com
last modified: July 2020
"""

import wx


class Example(wx.Frame):

    def __init__(self, *args, **kw):
        super(Example, self).__init__(*args, **kw)

        self.InitUI()

    def InitUI(self):

        pnl = wx.Panel(self)
        closeButton = wx.Button(pnl, label='Close', pos=(20, 20))

        closeButton.Bind(wx.EVT_BUTTON, self.OnClose)

        self.SetSize((350, 250))
        self.SetTitle('wx.Button')
        self.Centre()

    def OnClose(self, e):

        self.Close(True)


def main():

    app = wx.App()
    ex = Example(None)
    ex.Show()
    app.MainLoop()


if __name__ == '__main__':
    main()
In the code example we create a Close button which terminates the application when pressed.
cbtn = wx.Button(pnl, label='Close', pos=(20, 20))
A wx.Button widget is created. In the constructor of
the widget we provide the label for the button and the position
on the panel.
cbtn.Bind(wx.EVT_BUTTON, self.OnClose)
The wx.EVT_BUTTON event is triggered when we click on the button.
We specify the event handler for the event.
def OnClose(self, e):

    self.Close(True)
In the OnClose() method we terminate the application with
the Close() method.
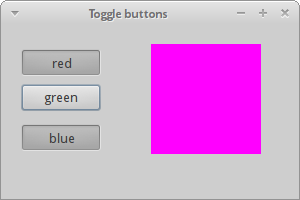
wx.ToggleButton
wx.ToggleButton is a button that has two states: pressed and not pressed.
You toggle between these two states by clicking on it. There are
situations where this functionality fits well.
#!/usr/bin/env python

"""
ZetCode wxPython tutorial

In this code example, we create three
toggle button widgets.

author: Jan Bodnar
website: www.zetcode.com
last modified: July 2020
"""

import wx


class Example(wx.Frame):

    def __init__(self, *args, **kw):
        super(Example, self).__init__(*args, **kw)

        self.InitUI()

    def InitUI(self):

        pnl = wx.Panel(self)

        self.col = wx.Colour(0, 0, 0)

        rtb = wx.ToggleButton(pnl, label='red', pos=(20, 25))
        gtb = wx.ToggleButton(pnl, label='green', pos=(20, 60))
        btb = wx.ToggleButton(pnl, label='blue', pos=(20, 100))

        self.cpnl  = wx.Panel(pnl, pos=(150, 20), size=(110, 110))
        self.cpnl.SetBackgroundColour(self.col)

        rtb.Bind(wx.EVT_TOGGLEBUTTON, self.ToggleRed)
        gtb.Bind(wx.EVT_TOGGLEBUTTON, self.ToggleGreen)
        btb.Bind(wx.EVT_TOGGLEBUTTON, self.ToggleBlue)

        self.SetSize((350, 250))
        self.SetTitle('Toggle buttons')
        self.Centre()

    def ToggleRed(self, e):

        obj = e.GetEventObject()
        isPressed = obj.GetValue()

        green = self.col.Green()
        blue = self.col.Blue()

        if isPressed:
            self.col.Set(255, green, blue)
        else:
            self.col.Set(0, green, blue)

        self.cpnl.SetBackgroundColour(self.col)
        self.cpnl.Refresh()

    def ToggleGreen(self, e):

        obj = e.GetEventObject()
        isPressed = obj.GetValue()

        red = self.col.Red()
        blue = self.col.Blue()

        if isPressed:
            self.col.Set(red, 255, blue)
        else:
            self.col.Set(red, 0, blue)

        self.cpnl.SetBackgroundColour(self.col)
        self.cpnl.Refresh()

    def ToggleBlue(self, e):

        obj = e.GetEventObject()
        isPressed = obj.GetValue()

        red = self.col.Red()
        green = self.col.Green()

        if isPressed:
            self.col.Set(red, green, 255)
        else:
            self.col.Set(red, green, 0)

        self.cpnl.SetBackgroundColour(self.col)
        self.cpnl.Refresh()


def main():

    app = wx.App()
    ex = Example(None)
    ex.Show()
    app.MainLoop()


if __name__ == '__main__':
    main()
We have red, green, and blue toggle buttons and a panel. We change the colour of the panel by clicking on the toggle buttons.
rtb = wx.ToggleButton(pnl, label='red', pos=(20, 25))
A wx.ToggleButton widget is created.
self.cpnl  = wx.Panel(pnl, pos=(150, 20), size=(110, 110))
self.cpnl.SetBackgroundColour(self.col)
This is a panel whose colour we will modify with the toggle buttons.
rtb.Bind(wx.EVT_TOGGLEBUTTON, self.ToggleRed)
The ToggleRed() event handler is called, when we click on
the rtb toggle button.
def ToggleRed(self, e):

    obj = e.GetEventObject()
    isPressed = obj.GetValue()

    green = self.col.Green()
    blue = self.col.Blue()

    if isPressed:
        self.col.Set(255, green, blue)
    else:
        self.col.Set(0, green, blue)

    self.cpnl.SetBackgroundColour(self.col)
In the ToggleRed() method we react to the fact that the
rtb button was pressed. We figure out the colour parts and update the
colour of the colour panel.
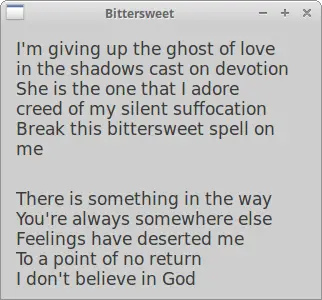
wx.StaticText
A wx.StaticText widget displays one or more lines of read-only text.
#!/usr/bin/python

"""
ZetCode wxPython tutorial

In this code example, we create a static text.

author: Jan Bodnar
website: www.zetcode.com
last modified: July 2020
"""

import wx


class Example(wx.Frame):

    def __init__(self, *args, **kw):
        super(Example, self).__init__(*args, **kw)

        self.InitUI()

    def InitUI(self):

        txt1 = '''I'm giving up the ghost of love
in the shadows cast on devotion
She is the one that I adore
creed of my silent suffocation
Break this bittersweet spell on me
lost in the arms of destiny'''

        txt2 = '''There is something in the way
You're always somewhere else
Feelings have deserted me
To a point of no return
I don't believe in God
But I pray for you'''

        pnl = wx.Panel(self)
        vbox = wx.BoxSizer(wx.VERTICAL)

        font = wx.Font(13, wx.DEFAULT, wx.NORMAL, wx.DEFAULT)

        st1 = wx.StaticText(pnl, label=txt1, style=wx.ALIGN_LEFT)
        st2 = wx.StaticText(pnl, label=txt2, style=wx.ALIGN_LEFT)

        st1.SetFont(font)
        st2.SetFont(font)

        vbox.Add(st1, flag=wx.ALL, border=15)
        vbox.Add(st2, flag=wx.ALL, border=15)

        pnl.SetSizer(vbox)

        self.SetTitle('Bittersweet')
        self.Centre()


def main():

    app = wx.App()
    ex = Example(None)
    ex.Show()
    app.MainLoop()


if __name__ == '__main__':
    main()
In the example we show two strophes of a Bittersweet song using the
wx.StaticText widget.
font = wx.Font(13, wx.DEFAULT, wx.NORMAL, wx.DEFAULT)
We create a font object for the text.
        txt1 = '''I'm giving up the ghost of love
in the shadows cast on devotion
She is the one that I adore
creed of my silent suffocation
Break this bittersweet spell on me
lost in the arms of destiny'''
This is a string to be shown in the wx.StaticText widget.
st1 = wx.StaticText(pnl, label=txt1, style=wx.ALIGN_LEFT)
We create the wx.StaticText widget. The text will be aligned
to the left.
st1.SetFont(font)
st2.SetFont(font)
We set the font to the static text widgets with SetFont().
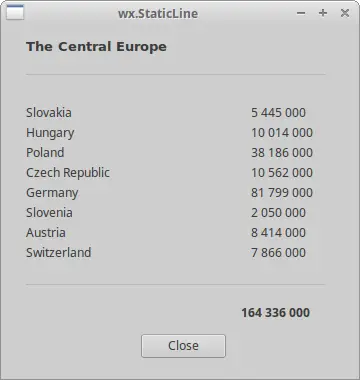
wx.StaticLine
This widget displays a simple line on the window. It can be horizontal or vertical.
#!/usr/bin/env python

"""
ZetCode wxPython tutorial

In this code example, we create a static line.

author: Jan Bodnar
website: www.zetcode.com
last modified: July 2020
"""


import wx


class Example(wx.Frame):

    def __init__(self, *args, **kw):
        super(Example, self).__init__(*args, **kw)

        self.InitUI()

    def InitUI(self):

        pnl = wx.Panel(self)

        font = wx.Font(10, wx.DEFAULT, wx.NORMAL, wx.BOLD)
        heading = wx.StaticText(self, label='The Central Europe',
                                pos=(25, 15), size=(200, -1))
        heading.SetFont(font)

        wx.StaticLine(self, pos=(25, 50), size=(300,1))

        wx.StaticText(self, label='Slovakia', pos=(25, 80))
        wx.StaticText(self, label='Hungary', pos=(25, 100))
        wx.StaticText(self, label='Poland', pos=(25, 120))
        wx.StaticText(self, label='Czech Republic', pos=(25, 140))
        wx.StaticText(self, label='Germany', pos=(25, 160))
        wx.StaticText(self, label='Slovenia', pos=(25, 180))
        wx.StaticText(self, label='Austria', pos=(25, 200))
        wx.StaticText(self, label='Switzerland', pos=(25, 220))

        wx.StaticText(self, label='5 445 000', pos=(250, 80))
        wx.StaticText(self, label='10 014 000', pos=(250, 100))
        wx.StaticText(self, label='38 186 000', pos=(250, 120))
        wx.StaticText(self, label='10 562 000', pos=(250, 140))
        wx.StaticText(self, label='81 799 000', pos=(250, 160))
        wx.StaticText(self, label='2 050 000', pos=(250, 180))
        wx.StaticText(self, label='8 414 000', pos=(250, 200))
        wx.StaticText(self, label='7 866 000', pos=(250, 220))

        wx.StaticLine(self, pos=(25, 260), size=(300,1))

        tsum = wx.StaticText(self, label='164 336 000', pos=(240, 280))
        sum_font = tsum.GetFont()
        sum_font.SetWeight(wx.BOLD)
        tsum.SetFont(sum_font)

        btn = wx.Button(self, label='Close', pos=(140, 310))

        btn.Bind(wx.EVT_BUTTON, self.OnClose)

        self.SetSize((360, 380))
        self.SetTitle('wx.StaticLine')
        self.Centre()

    def OnClose(self, e):

        self.Close(True)


def main():

    app = wx.App()
    ex = Example(None)
    ex.Show()
    app.MainLoop()


if __name__ == '__main__':
    main()
The script displays central european countries and their population.
The wx.StatLine makes it look more visually attractive.
wx.StaticLine(self, pos=(25, 50), size=(300,1))
This is the constructor of the wx.StaticLine
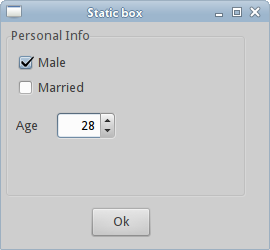
wx.StaticBox
This is a kind of a decorator widget. It is used to logically group various widgets. Note that this widget must be created before the widgets that it contains, and that those widgets should be siblings, not children, of the static box.
#!/usr/bin/python

import wx


class Example(wx.Frame):

    def __init__(self, *args, **kw):
        super(Example, self).__init__(*args, **kw)

        self.InitUI()

    def InitUI(self):

        pnl = wx.Panel(self)

        wx.StaticBox(pnl, label='Personal Info', pos=(5, 5), size=(240, 170))
        wx.CheckBox(pnl, label='Male', pos=(15, 30))
        wx.CheckBox(pnl, label='Married', pos=(15, 55))
        wx.StaticText(pnl, label='Age', pos=(15, 95))
        wx.SpinCtrl(pnl, value='1', pos=(55, 90), size=(60, -1), min=1, max=120)

        btn = wx.Button(pnl, label='Ok', pos=(90, 185), size=(60, -1))

        btn.Bind(wx.EVT_BUTTON, self.OnClose)

        self.SetSize((270, 250))
        self.SetTitle('Static box')
        self.Centre()
        self.Show(True)

    def OnClose(self, e):

        self.Close(True)


def main():

    ex = wx.App()
    Example(None)
    ex.MainLoop()


if __name__ == '__main__':
    main()
We have a wx.StaticBox which decorates other four widgets.
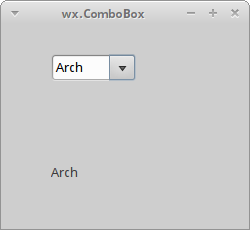
wx.ComboBox
wx.ComboBox is a combination of a single line text field, a button with a
down arrow image and a listbox. When you press the button, a listbox
appears. A user can select only one option from the supplied string list.
#!/usr/bin/python

import wx


class Example(wx.Frame):

    def __init__(self, *args, **kw):
        super(Example, self).__init__(*args, **kw)

        self.InitUI()

    def InitUI(self):

        pnl = wx.Panel(self)

        distros = ['Ubuntu', 'Arch', 'Fedora', 'Debian', 'Mint']
        cb = wx.ComboBox(pnl, pos=(50, 30), choices=distros,
            style=wx.CB_READONLY)

        self.st = wx.StaticText(pnl, label='', pos=(50, 140))
        cb.Bind(wx.EVT_COMBOBOX, self.OnSelect)

        self.SetSize((250, 230))
        self.SetTitle('wx.ComboBox')
        self.Centre()
        self.Show(True)

    def OnSelect(self, e):

        i = e.GetString()
        self.st.SetLabel(i)

def main():

    ex = wx.App()
    Example(None)
    ex.MainLoop()

if __name__ == '__main__':
    main()
Selected option from the combo box is shown in the label below.
distros = ['Ubuntu', 'Arch', 'Fedora', 'Debian', 'Mint']
The combo box will contain this list of strings.
cb = wx.ComboBox(pnl, pos=(50, 30), choices=distros,
            style=wx.CB_READONLY)
A wx.ComboBox widget is created. The choices parameter takes
a list of strings to display by the combo box. The wx.CB_READONLY
style makes the strings of the list read-only.
cb.Bind(wx.EVT_COMBOBOX, self.OnSelect)
When we select an option from the combo box, the wx.EVT_COMBOBOX event
is triggered. We plug the OnSelect() event handler to this event.
def OnSelect(self, e):

    i = e.GetString()
    self.st.SetLabel(i)
We get the selected item from the combo box and set it to the label.
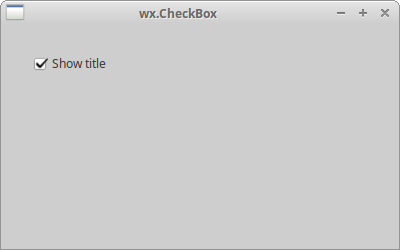
wx.CheckBox
A wx.CheckBox is a widget that has two states: on and off. It is
a box with a label. The label can be set to the right or to the left of the box.
If a wx.CheckBox is checked, it is represented by a tick in a box.
#!/usr/bin/env python

"""
ZetCode wxPython tutorial

In this example we create a checkbox widget.

author: Jan Bodnar
website: www.zetcode.com
last modified: July 2020
"""

import wx


class Example(wx.Frame):

    def __init__(self, *args, **kw):
        super(Example, self).__init__(*args, **kw)

        self.InitUI()

    def InitUI(self):

        pnl = wx.Panel(self)

        vbox = wx.BoxSizer(wx.HORIZONTAL)

        cb = wx.CheckBox(pnl, label='Show title')
        cb.SetValue(True)
        cb.Bind(wx.EVT_CHECKBOX, self.ShowOrHideTitle)

        vbox.Add(cb, flag=wx.TOP|wx.LEFT, border=30)

        pnl.SetSizer(vbox)

        self.SetTitle('wx.CheckBox')
        self.Centre()

    def ShowOrHideTitle(self, e):

        sender = e.GetEventObject()
        isChecked = sender.GetValue()

        if isChecked:
            self.SetTitle('wx.CheckBox')
        else:
            self.SetTitle('')


def main():

    app = wx.App()
    ex = Example(None)
    ex.Show()
    app.MainLoop()


if __name__ == '__main__':
    main()
In the above example we show or hide the window title with the
wx.CheckBox widget.
cb = wx.CheckBox(pnl, label='Show title')
This is the constructor of the wx.CheckBox widget.
cb.SetValue(True)
The title of the frame window is shown by default, so we check
the wx.CheckBox widget with the SetValue()
method.
cb.Bind(wx.EVT_CHECKBOX, self.ShowOrHideTitle)
The wx.EVT_CHECKBOX event is triggered when we click on the
wx.CheckBox widget. The ShowOrHideTitle() event handler
is called upon this event.
def ShowOrHideTitle(self, e):

    sender = e.GetEventObject()
    isChecked = sender.GetValue()

    if isChecked:
        self.SetTitle('wx.CheckBox')
    else:
        self.SetTitle('')
In the ShowOrHideTitle() method we show or hide the title
based on the state of the wx.CheckBox widget.
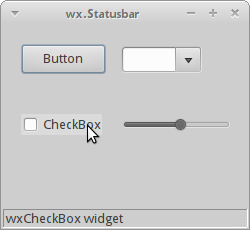
wx.StatusBar
The wx.StatusBar widget is used to display
application status information. It can be divided into several parts
to show different kind of information. We can insert other widgets
into the wx.StatusBar. It can be used as an alternative to dialogs,
since dialogs are ofted abused and they are disliked by most users.
We can create a wx.StatusBar in two ways. We can manually create our
own wx.StatusBar and call SetStatusBar() method or we can simply call
the CreateStatusBar() method. The latter method creates a default
wx.StatusBar for us.
#!/usr/bin/python

import wx


class Example(wx.Frame):

    def __init__(self, *args, **kw):
        super(Example, self).__init__(*args, **kw)

        self.InitUI()

    def InitUI(self):

        pnl = wx.Panel(self)

        button = wx.Button(pnl, label='Button', pos=(20, 20))
        text = wx.CheckBox(pnl, label='CheckBox', pos=(20, 90))
        combo = wx.ComboBox(pnl, pos=(120, 22), choices=['Python', 'Ruby'])
        slider = wx.Slider(pnl, 5, 6, 1, 10, (120, 90), (110, -1))

        pnl.Bind(wx.EVT_ENTER_WINDOW, self.OnWidgetEnter)
        button.Bind(wx.EVT_ENTER_WINDOW, self.OnWidgetEnter)
        text.Bind(wx.EVT_ENTER_WINDOW, self.OnWidgetEnter)
        combo.Bind(wx.EVT_ENTER_WINDOW, self.OnWidgetEnter)
        slider.Bind(wx.EVT_ENTER_WINDOW, self.OnWidgetEnter)

        self.sb = self.CreateStatusBar()

        self.SetSize((250, 230))
        self.SetTitle('wx.Statusbar')
        self.Centre()
        self.Show(True)

    def OnWidgetEnter(self, e):

        name = e.GetEventObject().GetClassName()
        self.sb.SetStatusText(name + ' widget')
        e.Skip()

def main():

    ex = wx.App()
    Example(None)
    ex.MainLoop()

if __name__ == '__main__':
    main()
In our example, we have a wx.Frame widget and five other widgets.
If we hover a mouse pointer over a widget, its name is shown in the
wx.StatusBar.
pnl.Bind(wx.EVT_ENTER_WINDOW, self.OnWidgetEnter)
The EVT_ENTER_WINDOW event is generated if we enter the area of a widget.
self.sb = self.CreateStatusBar()
A statusbar is created with the CreateStatusBar() method.
def OnWidgetEnter(self, e):

    name = e.GetEventObject().GetClassName()
    self.sb.SetStatusText(name + ' widget')
    e.Skip()
Inside the OnWidgetEnter() method we figure out the name of the widget that
we enter with the mouse pointer. We set a status text with the SetStatusText()
method.
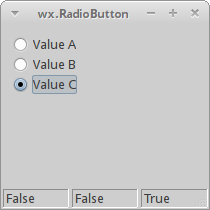
wx.RadioButton
wx.RadioButton is a widget that allows the user to select a
single exclusive choice from a group of options. A group of
radio buttons is defined by having the first radio button in
the group contain the wx.RB_GROUP style. All other radio buttons
defined after the first radio button with this style flag
will be added to the function group of the first radio button.
Declaring another radio button with the wx.RB_GROUP flag will
start a new radio button group.
#!/usr/bin/python

import wx


class Example(wx.Frame):

    def __init__(self, *args, **kw):
        super(Example, self).__init__(*args, **kw)

        self.InitUI()

    def InitUI(self):

        pnl = wx.Panel(self)

        self.rb1 = wx.RadioButton(pnl, label='Value A', pos=(10, 10),
            style=wx.RB_GROUP)
        self.rb2 = wx.RadioButton(pnl, label='Value B', pos=(10, 30))
        self.rb3 = wx.RadioButton(pnl, label='Value C', pos=(10, 50))

        self.rb1.Bind(wx.EVT_RADIOBUTTON, self.SetVal)
        self.rb2.Bind(wx.EVT_RADIOBUTTON, self.SetVal)
        self.rb3.Bind(wx.EVT_RADIOBUTTON, self.SetVal)

        self.sb = self.CreateStatusBar(3)

        self.sb.SetStatusText("True", 0)
        self.sb.SetStatusText("False", 1)
        self.sb.SetStatusText("False", 2)

        self.SetSize((210, 210))
        self.SetTitle('wx.RadioButton')
        self.Centre()
        self.Show(True)

    def SetVal(self, e):

        state1 = str(self.rb1.GetValue())
        state2 = str(self.rb2.GetValue())
        state3 = str(self.rb3.GetValue())

        self.sb.SetStatusText(state1, 0)
        self.sb.SetStatusText(state2, 1)
        self.sb.SetStatusText(state3, 2)

def main():

    ex = wx.App()
    Example(None)
    ex.MainLoop()

if __name__ == '__main__':
    main()
We have a group of three radio buttons. The state of each of the radio buttons is displayed in the statusbar.
self.rb1 = wx.RadioButton(pnl, label='Value A', pos=(10, 10),
    style=wx.RB_GROUP)
self.rb2 = wx.RadioButton(pnl, label='Value B', pos=(10, 30))
self.rb3 = wx.RadioButton(pnl, label='Value C', pos=(10, 50))
We create three radio buttons. The first radio button has the wx.RB_GROUP
style set. It starts a new radio group.
self.rb1.Bind(wx.EVT_RADIOBUTTON, self.SetVal)
We bind the wx.EVT_RADIOBUTTON event to the
SetVal() event handler.
self.sb = self.CreateStatusBar(3)

self.sb.SetStatusText("True", 0)
self.sb.SetStatusText("False", 1)
self.sb.SetStatusText("False", 2)
We create a statusbar with three fields. We set initial text to the statusbar corresponding with the radio button states.
def SetVal(self, e):

    state1 = str(self.rb1.GetValue())
    state2 = str(self.rb2.GetValue())
    state3 = str(self.rb3.GetValue())

    self.sb.SetStatusText(state1, 0)
    self.sb.SetStatusText(state2, 1)
    self.sb.SetStatusText(state3, 2)
Inside the SetVal() method we find out the states of the radio buttons.
We update the statusbar fields to the current radio button values.
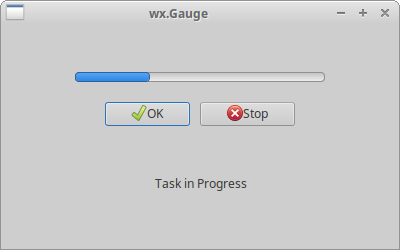
wx.Gauge
wx.Gauge is a widget that is used, when we process lengthy tasks.
It has an indicator to show the current state of a task.
#!/usr/bin/env python

"""
ZetCode wxPython tutorial

In this example we create gauge widget.

author: Jan Bodnar
website: www.zetcode.com
last modified: July 2020
"""

import wx

TASK_RANGE = 50

class Example(wx.Frame):

    def __init__(self, *args, **kw):
        super(Example, self).__init__(*args, **kw)

        self.InitUI()

    def InitUI(self):

        self.timer = wx.Timer(self, 1)
        self.count = 0

        self.Bind(wx.EVT_TIMER, self.OnTimer, self.timer)

        pnl = wx.Panel(self)
        vbox = wx.BoxSizer(wx.VERTICAL)
        hbox1 = wx.BoxSizer(wx.HORIZONTAL)
        hbox2 = wx.BoxSizer(wx.HORIZONTAL)
        hbox3 = wx.BoxSizer(wx.HORIZONTAL)

        self.gauge = wx.Gauge(pnl, range=TASK_RANGE, size=(250, -1))
        self.btn1 = wx.Button(pnl, wx.ID_OK)
        self.btn2 = wx.Button(pnl, wx.ID_STOP)
        self.text = wx.StaticText(pnl, label='Task to be done')

        self.Bind(wx.EVT_BUTTON, self.OnOk, self.btn1)
        self.Bind(wx.EVT_BUTTON, self.OnStop, self.btn2)

        hbox1.Add(self.gauge, proportion=1, flag=wx.ALIGN_CENTRE)
        hbox2.Add(self.btn1, proportion=1, flag=wx.RIGHT, border=10)
        hbox2.Add(self.btn2, proportion=1)
        hbox3.Add(self.text, proportion=1)

        vbox.Add((0, 30))

        vbox.Add(hbox1, flag=wx.ALIGN_CENTRE)

        vbox.Add((0, 20))

        vbox.Add(hbox2, proportion=1, flag=wx.ALIGN_CENTRE)
        vbox.Add(hbox3, proportion=1, flag=wx.ALIGN_CENTRE)

        pnl.SetSizer(vbox)

        self.SetTitle('wx.Gauge')
        self.Centre()

    def OnOk(self, e):

        if self.count >= TASK_RANGE:
            return

        self.timer.Start(100)
        self.text.SetLabel('Task in Progress')

    def OnStop(self, e):

        if self.count == 0 or self.count >= TASK_RANGE or not self.timer.IsRunning():
            return

        self.timer.Stop()
        self.text.SetLabel('Task Interrupted')

    def OnTimer(self, e):

        self.count = self.count + 1
        self.gauge.SetValue(self.count)

        if self.count == TASK_RANGE:

            self.timer.Stop()
            self.text.SetLabel('Task Completed')


def main():

    app = wx.App()
    ex = Example(None)
    ex.Show()
    app.MainLoop()


if __name__ == '__main__':
    main()
We have a gauge and two buttons. One button starts the gauge, the other button stops the gauge.
self.timer = wx.Timer(self, 1)
self.count = 0
We use the wx.Timer to execute code at specific intervals.
We will update the gauge at those moments. The count variable is used
to determine the portion of the task already done.
self.gauge = wx.Gauge(pnl, range=TASK_RANGE, size=(250, -1))
This is the constructor of the wx.Gauge widget. The
range parameter sets the maximum integer value of the widget.
def OnOk(self, e):

    if self.count >= TASK_RANGE:
        return

    self.timer.Start(100)
    self.text.SetLabel('Task in Progress')
When we click on the OK button, the OnOk() method is called.
We first check if the count variable is within the range of the task.
If not, we return from the method. If the task is not yet completed, we
start the timer and update the static text.
def OnStop(self, e):

    if self.count == 0 or self.count >= TASK_RANGE or not self.timer.IsRunning():
        return

    self.timer.Stop()
    self.text.SetLabel('Task Interrupted')
The OnStop() method is called, when we click on the Stop button.
We check the conditions for stopping the task. If we have met them, we stop the
timer and update the static text.
def OnTimer(self, e):

    self.count = self.count + 1
    self.gauge.SetValue(self.count)

    if self.count == TASK_RANGE:

        self.timer.Stop()
        self.text.SetLabel('Task Completed')
The OnTimer() method is called periodically after starting the timer.
In the method we update the cout variable and the gauge widget.
If the count variable is equal to the TASK_RANGE, we stop the
timer and update the static text.
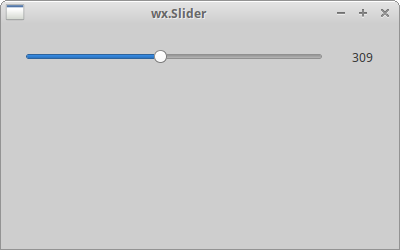
wx.Slider
wx.Slider is a widget that has a simple handle. This handle can be
pulled back and forth. This way we can choose a specific task.
#!/usr/bin/env python

"""
ZetCode wxPython tutorial

In this example we create slider control.

author: Jan Bodnar
website: www.zetcode.com
last modified: July 2020
"""

import wx


class Example(wx.Frame):

    def __init__(self, *args, **kw):
        super(Example, self).__init__(*args, **kw)

        self.InitUI()

    def InitUI(self):

        pnl = wx.Panel(self)

        sizer = wx.GridBagSizer(5, 5)

        sld = wx.Slider(pnl, value=200, minValue=150, maxValue=500,
                        style=wx.SL_HORIZONTAL)

        sld.Bind(wx.EVT_SCROLL, self.OnSliderScroll)
        sizer.Add(sld, pos=(0, 0), flag=wx.ALL|wx.EXPAND, border=25)

        self.txt = wx.StaticText(pnl, label='200')
        sizer.Add(self.txt, pos=(0, 1), flag=wx.TOP|wx.RIGHT, border=25)

        sizer.AddGrowableCol(0)
        pnl.SetSizer(sizer)

        self.SetTitle('wx.Slider')
        self.Centre()

    def OnSliderScroll(self, e):

        obj = e.GetEventObject()
        val = obj.GetValue()

        self.txt.SetLabel(str(val))


def main():

    app = wx.App()
    ex = Example(None)
    ex.Show()
    app.MainLoop()


if __name__ == '__main__':
    main()
A value selected in the slider is shown in the static text.
sld = wx.Slider(pnl, value=200, minValue=150, maxValue=500,
                style=wx.SL_HORIZONTAL)
A wx.Slider is created. We provide the initial position of the
slider with the value parameter and the minimum and maximum slider positions
with the minValue and maxValue parameters. The
wx.SL_HORIZONTAL makes the slider to be horizontal.
sld.Bind(wx.EVT_SCROLL, self.OnSliderScroll)
When the wx.EVT_SCROLL event is encountered, the
OnSliderScroll() method is called.
self.txt = wx.StaticText(pnl, label='200')
The currently selected slider value is displayed in the static text, which we position below the slider.
def OnSliderScroll(self, e):

    obj = e.GetEventObject()
    val = obj.GetValue()

    self.txt.SetLabel(str(val))
In the OnSliderScroll() method we get the sender of the event. We get the
current value of the slider and set it to the static text.
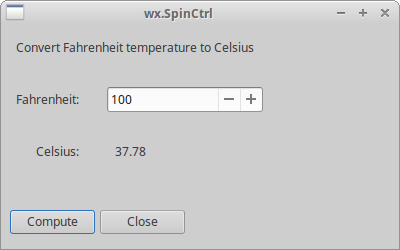
wx.SpinCtrl
The wx.SpinCtrl widget lets us increment and decrement a value.
#!/usr/bin/env python

"""
ZetCode wxPython tutorial

In this example we create spin control.

author: Jan Bodnar
website: www.zetcode.com
last modified: July 2020
"""

import wx


class Example(wx.Frame):

    def __init__(self, *args, **kw):
        super(Example, self).__init__(*args, **kw)

        self.InitUI()

    def InitUI(self):

        pnl = wx.Panel(self)

        sizer = wx.GridBagSizer(5, 5)

        st1 = wx.StaticText(pnl, label='Convert Fahrenheit temperature to Celsius')
        sizer.Add(st1, pos=(0, 0), span=(1, 2), flag=wx.ALL, border=15)

        st2 = wx.StaticText(pnl, label='Fahrenheit:')
        sizer.Add(st2, pos=(1, 0), flag=wx.ALL | wx.ALIGN_CENTER, border=15)

        self.sc = wx.SpinCtrl(pnl, value='0')
        self.sc.SetRange(-459, 1000)

        sizer.Add(self.sc, pos=(1, 1), flag=wx.ALIGN_CENTER)

        st3 = wx.StaticText(pnl, label='Celsius:')
        sizer.Add(st3, pos=(2, 0), flag=wx.ALL|wx.ALIGN_RIGHT, border=15)

        self.celsius = wx.StaticText(pnl, label='')
        sizer.Add(self.celsius, pos=(2, 1), flag=wx.ALL, border=15)

        computeButton = wx.Button(pnl, label='Compute')
        computeButton.SetFocus()
        sizer.Add(computeButton, pos=(3, 0), flag=wx.ALIGN_RIGHT|wx.TOP, border=30)

        closeButton = wx.Button(pnl, label='Close')
        sizer.Add(closeButton, pos=(3, 1), flag=wx.ALIGN_LEFT|wx.TOP, border=30)

        computeButton.Bind(wx.EVT_BUTTON, self.OnCompute)
        closeButton.Bind(wx.EVT_BUTTON, self.OnClose)

        pnl.SetSizer(sizer)

        self.SetTitle('wx.SpinCtrl')
        self.Centre()

    def OnClose(self, e):

        self.Close(True)

    def OnCompute(self, e):

        fahr = self.sc.GetValue()
        cels = round((fahr - 32) * 5 / 9.0, 2)
        self.celsius.SetLabel(str(cels))


def main():

    app = wx.App()
    ex = Example(None)
    ex.Show()
    app.MainLoop()


if __name__ == '__main__':
    main()
The script converts Fahrenheit temperature to Celsius. We use
the wx.SpinCtrl widget to select a value for the
Fahrenheit temperature.
self.sc = wx.SpinCtrl(pnl, value='0')
self.sc.SetRange(-459, 1000)
We create a wx.SpinCtrl widget with initial value 0.
The SetRange() sets a range of values for the widget.
def OnCompute(self, e):

    fahr = self.sc.GetValue()
    cels = round((fahr - 32) * 5 / 9.0, 2)
    self.celsius.SetLabel(str(cels))
When we click on the compute button the OnCompute() method is called.
In the body of the method we get the current value from the spin control.
We compute the Celsius temperature and set the computed temperature to
the static text widget.
This part of the wxPython tutorial was dedicated to core wxPython widgets.